How to Build An AR9: Parts Guide & Instructions
Posted by 80-Lower.com on Sep 23rd 2024
This is your ultimate AR9 pistol guide! We're covering parts compatibility between the AR-9 and AR-15, how to pick the right parts for the perfect 9mm AR build, and we're providing instructions on how to build an AR-9, start to finish. Let's get started.
What is the AR-9?
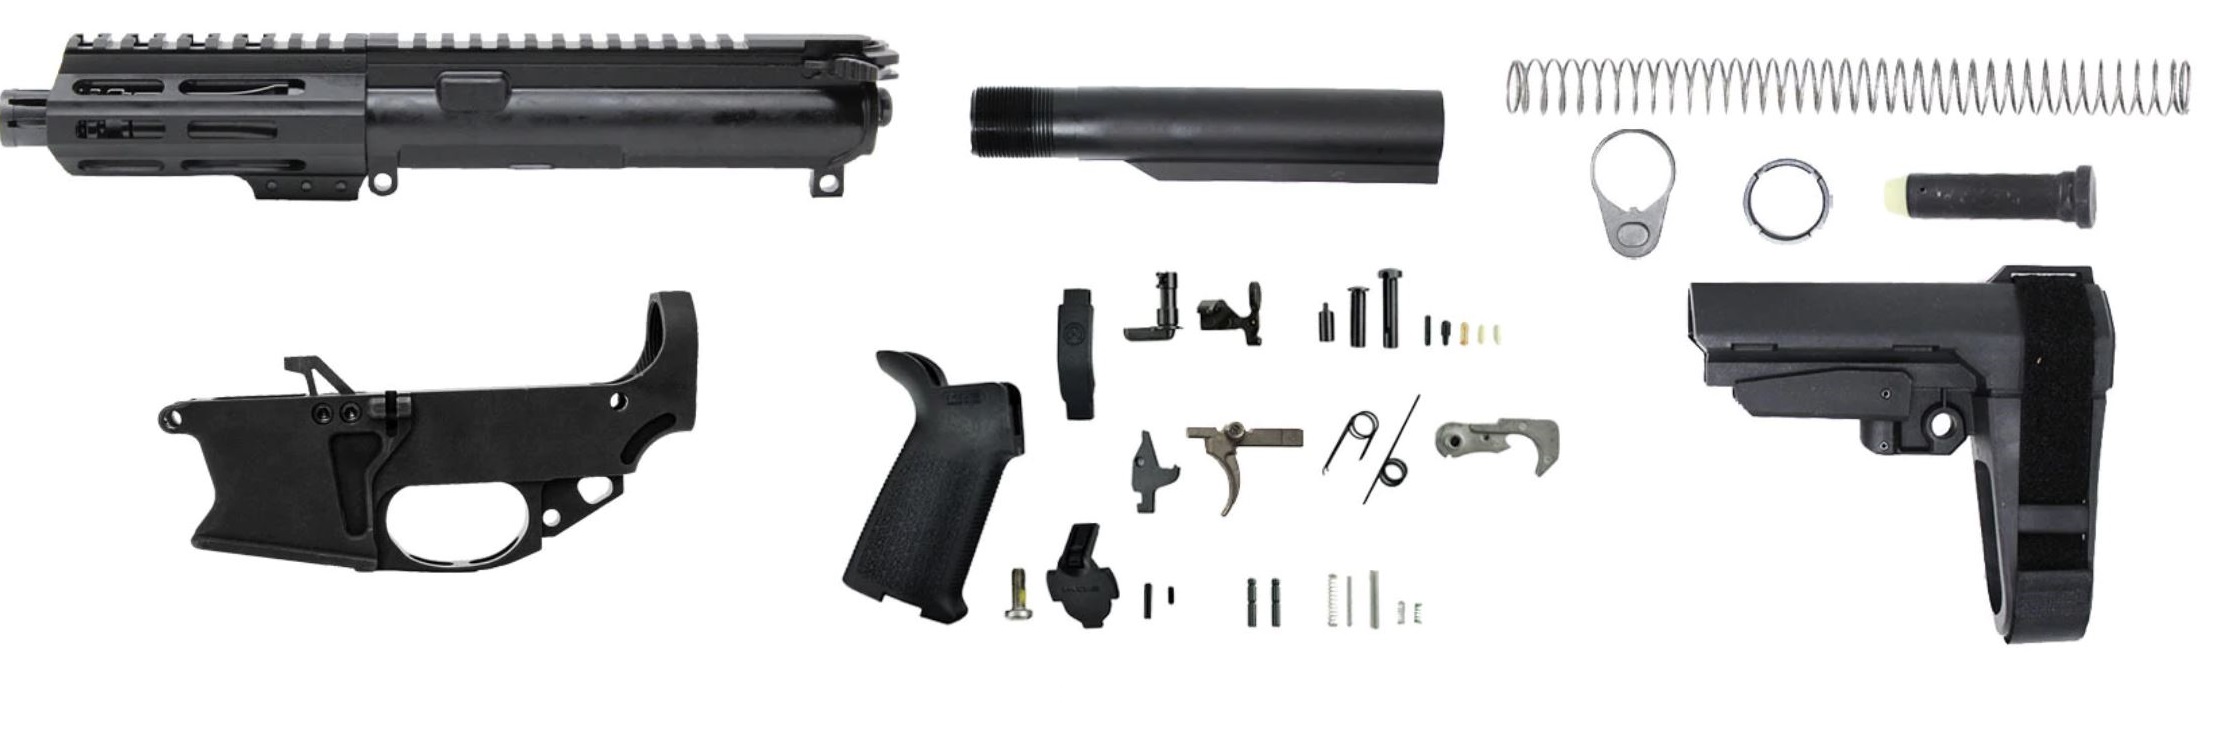
A typical 9mm AR Pistol Kit
The AR-9 is a 9mm variant of the AR-15. Unlike an AR-15 converted to shoot 9mm cartridges with a conversion block, the AR-9 uses a dedicated receiver with a built-in ejector, and a modified magazine well intended for 9mm magazines.
Differences Between AR-9 and AR-15
Beyond key differences in certain parts -- which we'll cover below -- the AR-9 also functions differently than the AR-15. Specifically, it lacks the typical direct-impingement gas system.
The AR-9 uses gas blowback
Look closely at an AR-9 upper, and you won’t see a gas tube underneath the handguard. That’s because the AR-9 uses blowback to cycle the bolt. Here’s how it works:
- The firing pin hits the primer on the 9mm cartridge.
- Powder burns in the firing chamber and creates gas.
- The rapid expansion of gas expels the bullet from the barrel.
- That same gas forces the spent casing to slam against the bolt inside the chamber.
- The kinetic energy of the spent casing drives the bolt back into the buffer tube.
- The spent casing is ejected, the bolt drives forward, and a new round is chambered.
The AR-15 uses a gas block and tube
The AR-15 uses a direct-impingement system with a gas tube to cycle the bolt:
- The firing pin hits the primer on the rifle cartridge.
- Powder burns in the chamber, accelerating the round.
- Excess gas travels to a gas port and through a tube or piston.
- The gas/piston travels back into the upper receiver and bolt carrier group.
- A key atop the bolt traps the gas/piston and allows it to drive the bolt into the buffer.
- The spent casing is ejected, the bolt drives forward, and a new round is chambered.
AR9 vs. AR-15 parts: What’s different?
These parts are specific to the AR-9 platform; they cannot be interchanged with the AR-15.
Bolt carrier group

The AR-9 uses a proprietary, one-piece bolt. It lacks the AR-15's locking, rotating lugs and, since the 9mm operates using blowback, it has no gas key.
Lower receiver

The AR-9 lower receiver has a smaller magazine well that accommodates GLOCK 9mm magazines, and it uses a different magazine catch assembly. The AR-9 bolt does not have an ejector -- instead, the ejector is bolted to the lower receiver, resting behind the magazine well and in front of the fire control cavity.
Barrel

The AR-9 obviously requires a 9mm barrel to function. The exterior dimension and shape of the 9mm barrel extension is identical to the AR-15's barrel extension. This is because the AR-9 and AR-15 share stripped upper receivers.
What AR9 and AR-15 parts are the same?
Let's look at which parts the AR-9 and AR-15 share.
Stripped Upper receiver

Although the AR-9 doesn't use a gas system, it still uses the AR-15's stripped upper receiver. The 9mm bolt fits inside the upper in the same manner as the AR-15 bolt, and it uses the AR-15's standard charging handle. The AR-15's barrel nut is also used to secure the AR-9 barrel to the receiver.
Handguard

Since the AR-9 uses the same upper receiver as the AR-15, it's compatible with standard AR-15 handguards.
Lower parts kit

The AR-9 lower uses a standard AR-15 lower parts kit. These specific components are shared with the AR-15:
- Trigger
- Trigger Pin
- Trigger Spring
- Hammer
- Hammer Pin
- Hammer Spring
- Disconnector
- Disconnector spring
- Safety Selector Lever
- Bolt Catch Assembly
- Pistol Grip & Screw
- Front Pivot Pin
- Pivot Pin Detent
- Pivot Pin Spring
- Rear Takedown Pin
- Takedown Pin Detent
- Takedown Pin Spring
Buffer assembly

The AR-15's buffer tube, recoil spring, latch plate, and castle nut are shared with the AR-9. Only the buffer itself is different (more on that next).
Optimal Specs for The AR9
Picking the right parts to build a reliable, accurate AR9 is simple. Let's review the best options for barrel length, twist rate, and buffer weight.
9MM ballistic data
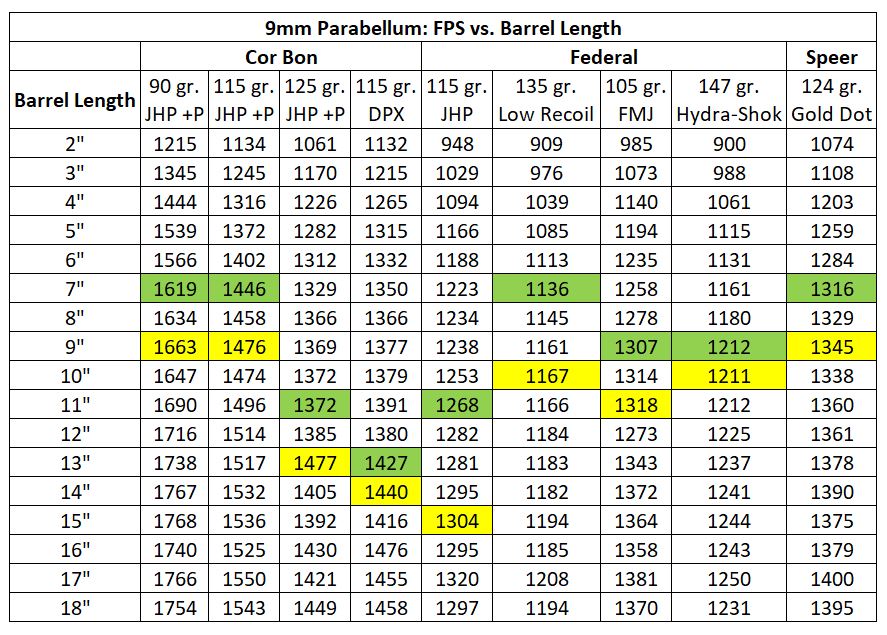
Credit to www.ballisticsbytheinch.com for the data.
We can use this graph to decide what barrel length is best for the AR-9, for various 9mm ammo. Federal 115-grain JHPs (center column) are some of the most common 9mm rounds on the market, so let's look at this data as an example.
The best barrel length for the AR-9
Averaged across all loads, the optimal barrel length for the AR-9 is 7" to 9". At these lengths, adding more barrel will only provide small gains in velocity. If you plan on shooting subsonic ammo with a suppressor, a 5" barrel is best.
The best twist rate for 9mm
Picking the best twist rate for your AR-9 pistol is easy: 1:10. This is the universally accepted, optimal twist rate for all 9mm rounds.
The correct AR-9 buffer weight
You need a 7.5- to 8.5-ounce buffer for the AR-9. This heavy buffer's required to accommodate the 9mm cartridge's high recoil force, created by its blowback functionality. Pick the 7.5-ounce buffer for subsonic loads. Stick with 8.5 ounces for supersonic loads.
How to Build The AR-9 Lower
Putting together the AR-9 lower is easy. Some components already installed, like the magazine catch assembly, and the ejector. Your 9mm lower will have a threaded bolt catch, or a roll pin fitting for the bolt catch. We'll cover how to assemble both below.
Tools Required
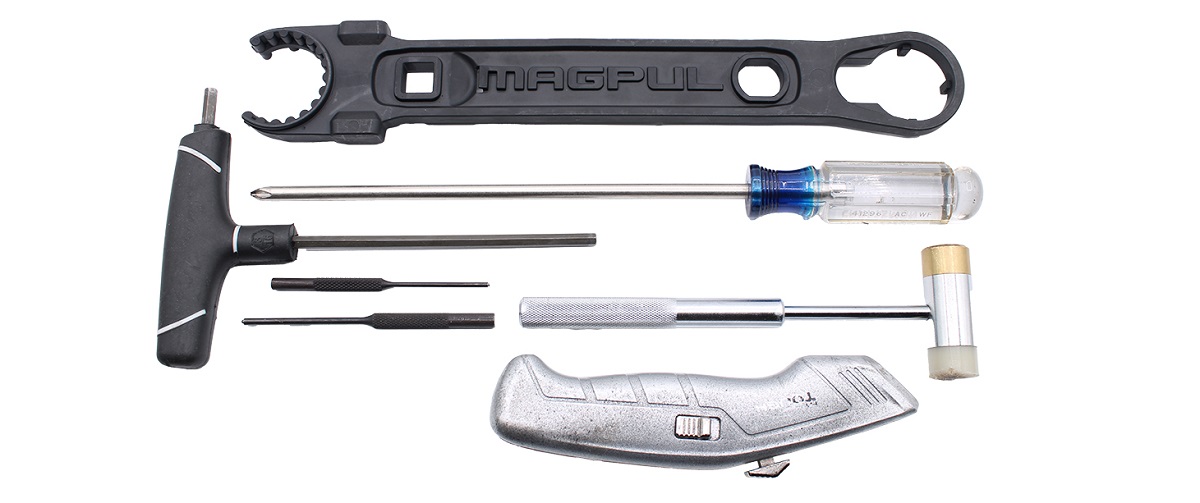
To assemble the lower, you'll need some tools:
- Armorer's Wrench. The armorer's wrench is used to tighten the buffer tube's castle nut.
- Gunsmith Hammer. Required for tapping on pins and punches during the installation.
- Screwdriver. Your pistol grip screw may require a Philips or Flathead screwdriver.
- 3/16" Allen Key. Some pistol grip screws instead have a 3/16" hex-head fitting.
- 3/32" punch. If your bolt catch uses a roll pin fitting, this is required for the roll pin.
- 1/8" punch. If your lower has a separate trigger guard, this is required for its roll pin.
- Thin blade. A razorblade or thin knife blade is helpful for installing the pivot pin detent.
1. Install Trigger and Hammer Springs

Install the hammer and trigger springs onto their respective components, as exampled above. Ensure the trigger spring's ends face toward the front of the trigger. Ensure the hammer spring ends also face the same direction as the face of the hammer.
2. Install Disconnector Spring
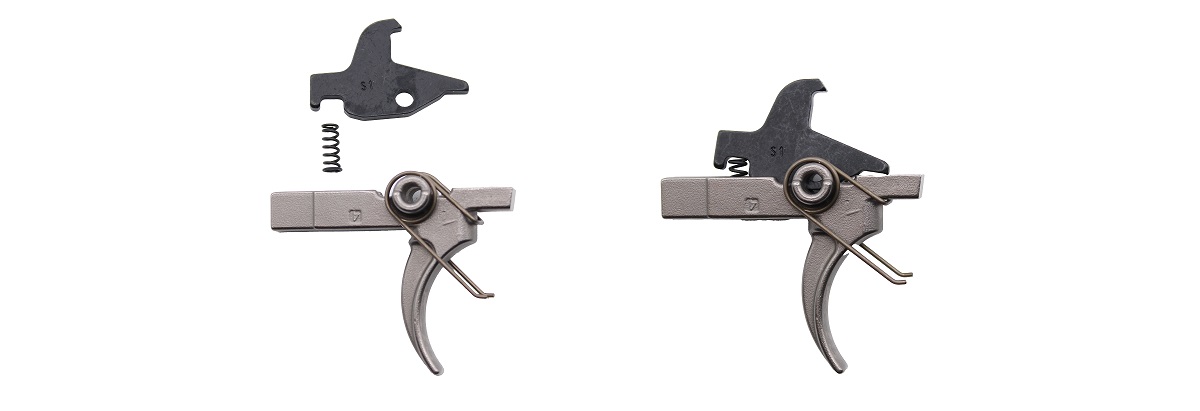
Insert the disconnector spring into the top rearward portion of the trigger. The larger end of the spring should seat inside the trigger. Once its spring is installed, the disconnector will rest atop the trigger, as exampled above.
3. Install Trigger Assembly
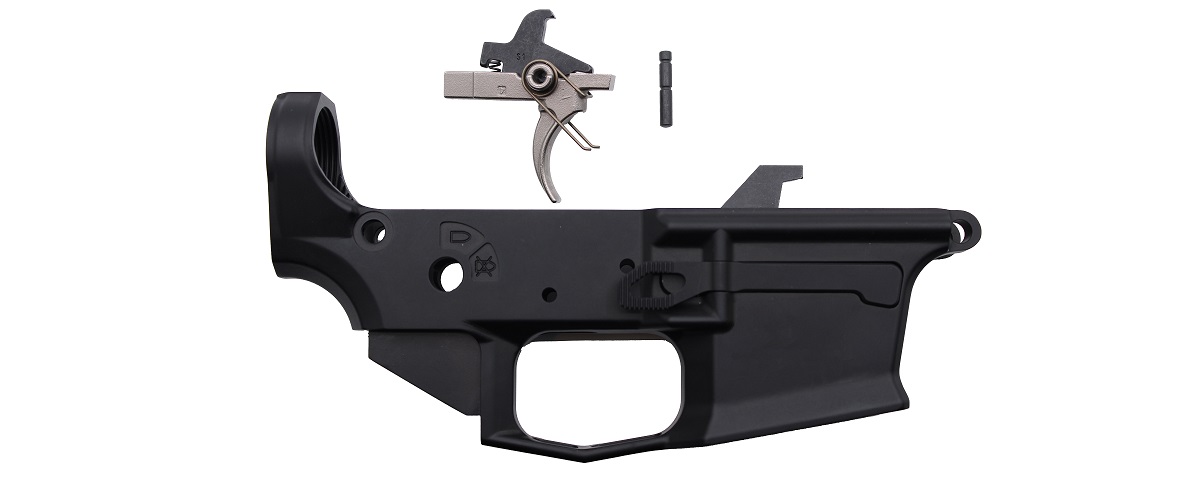
Drop the trigger assembly, with the disconnector atop the trigger, into the receiver. Collect one of the hammer and trigger pins to secure. Both pins are the same.
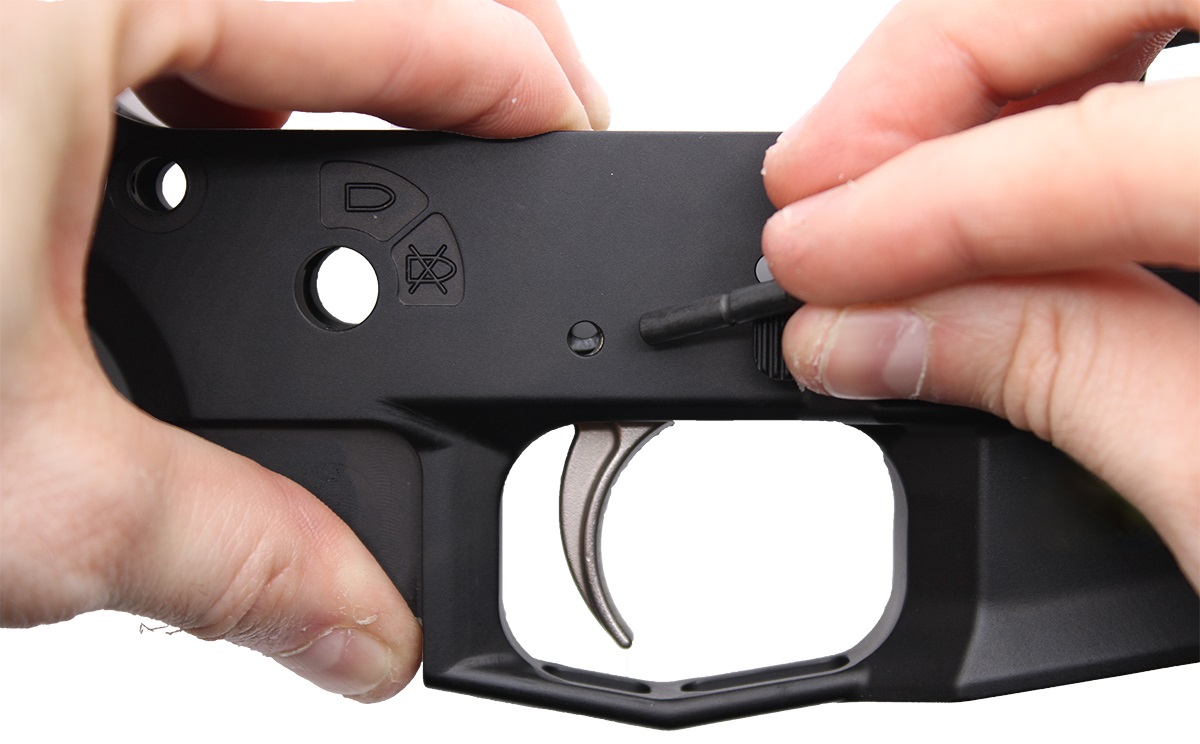
Once the trigger is resting inside the receiver, press down on the disconnector to align the pin holes in the disconnector, trigger assembly, and receiver. Then insert the trigger pin. You may need to gently tap the pin into the receiver using a gunsmith hammer. Use the polymer head of the hammer to avoid damaging the receiver's finish.
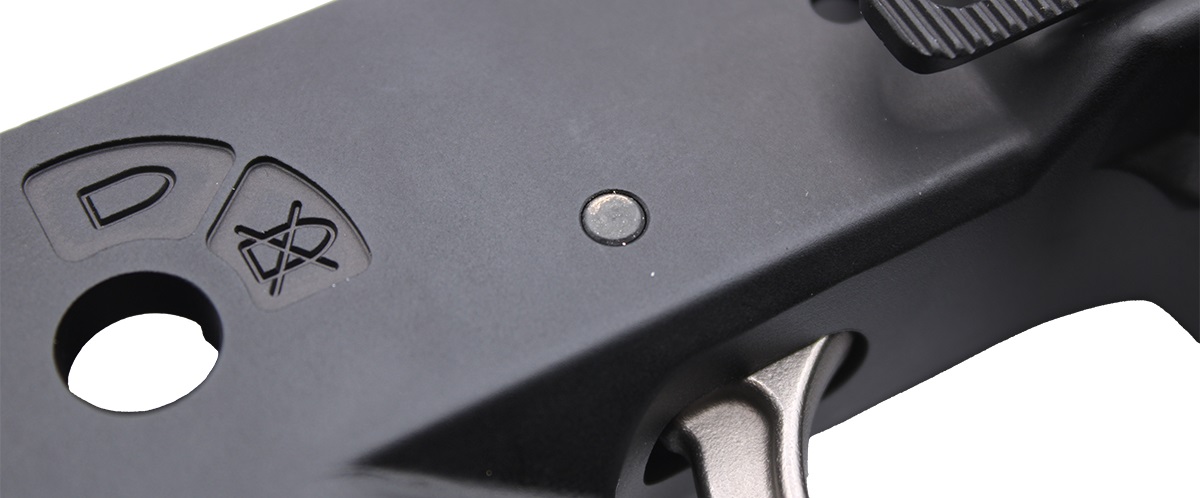
Once installed, the heads of the pin should rest flush with both sides of the receiver.
4. Install Hammer
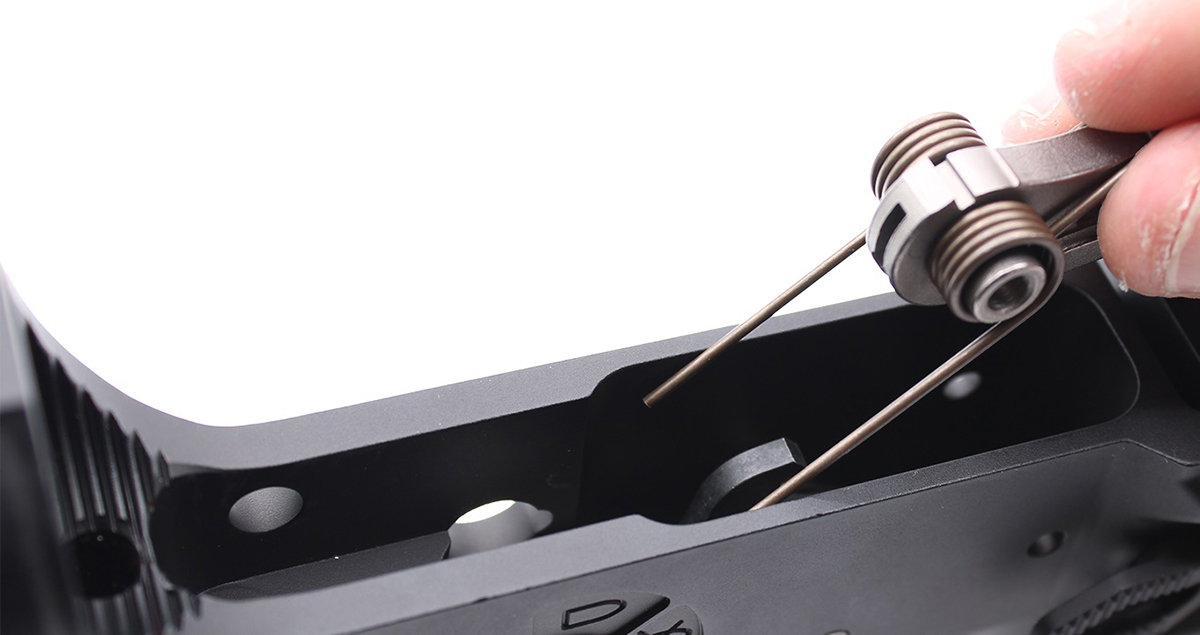
Insert the hammer into the receiver. The hammer should be oriented so its face is pointed toward the magazine well, and both spring ends are facing the rear of the receiver.
The hammer spring ends need to rest atop the trigger assembly when inserted inside the receiver.

With the spring ends seated, push the hammer down and rotate its face upward. The hammer spring provides a high level of resistance; moderate force is required to orient it correctly.
Align the hammer pin holes with the receiver pin hole, and insert the hammer spring. Again, the pin may need to be tapped into place with a gunsmithing hammer.
5. Install Bolt Catch
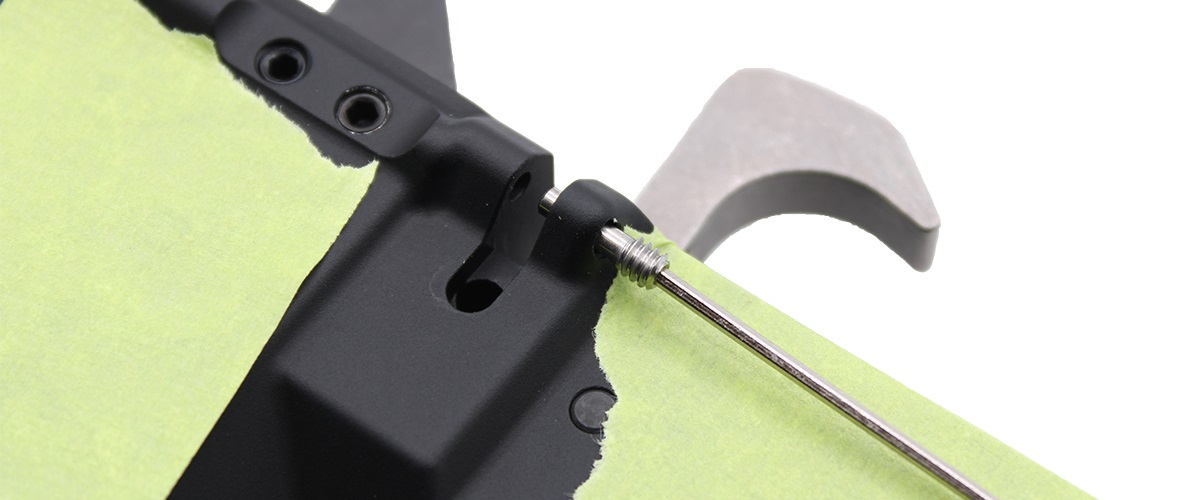
Taping the side of your receiver is recommended for this step; this will help prevent tools from scratching the finish on your lower.
If your 9mm lower came with a threaded bolt catch pin, unscrew it with an appropriately sized Allen key. If your 9mm lower requires a roll pin, skip to the next step.
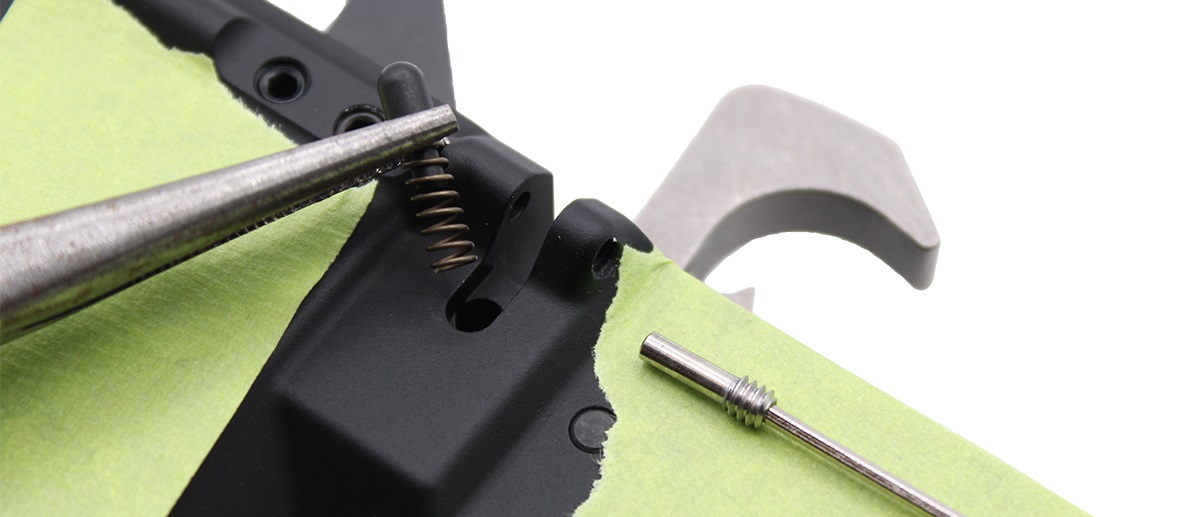
Install the bolt catch plunger atop its spring. Drop the spring into the bolt beneath the bolt catch pin.
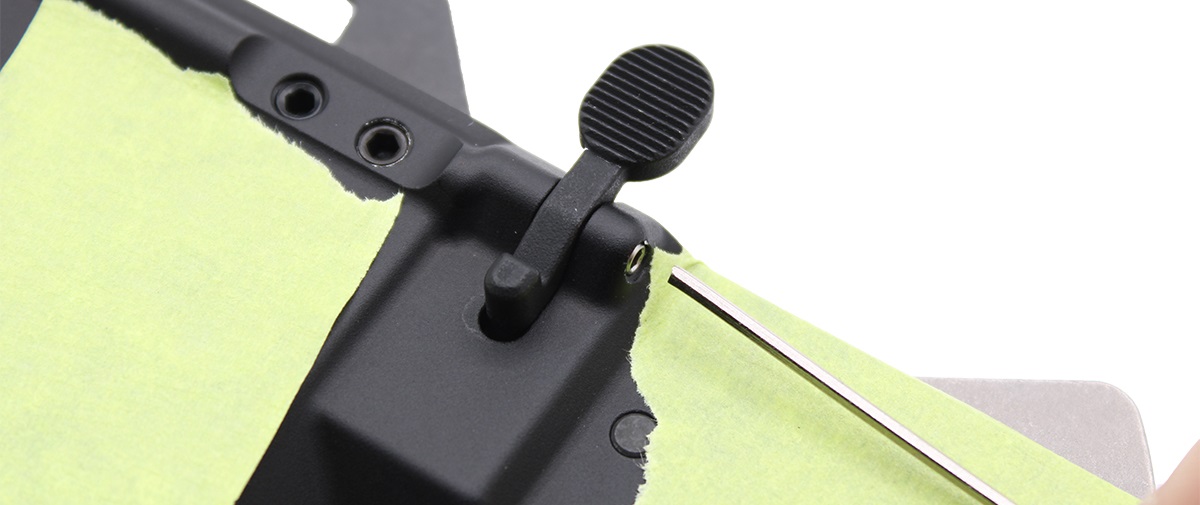
After seating the plunger and spring, press the bolt catch into its cut-out, oriented as shown above. If your lower came with a threaded pin, reinstall the pin and tighten it.
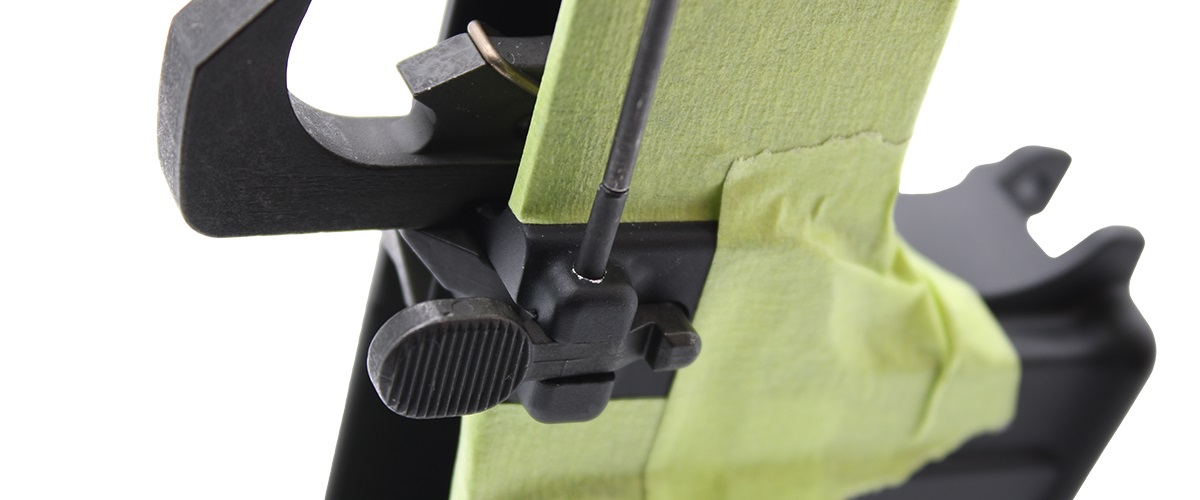
If your lower requires a roll pin to secure the bolt catch, tap the pin into the fitting using a 3/32" punch and gunsmithing hammer until it rests flush on both sides of the bolt catch.
6. Install Safety Lever & Pistol Grip
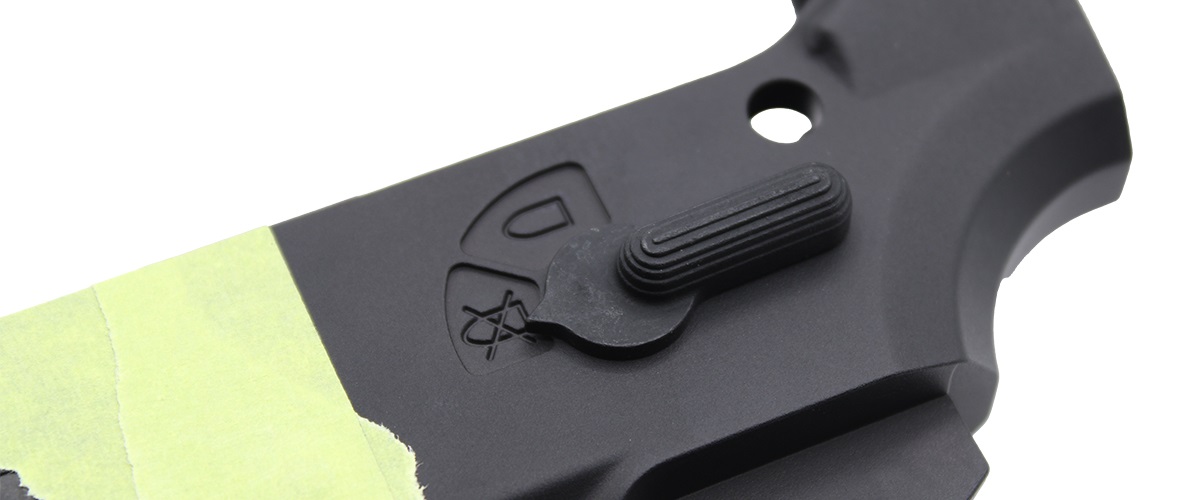
Drop the safety lever into the receiver from the right side. Orient the lever so it is in the "SAFE" position.
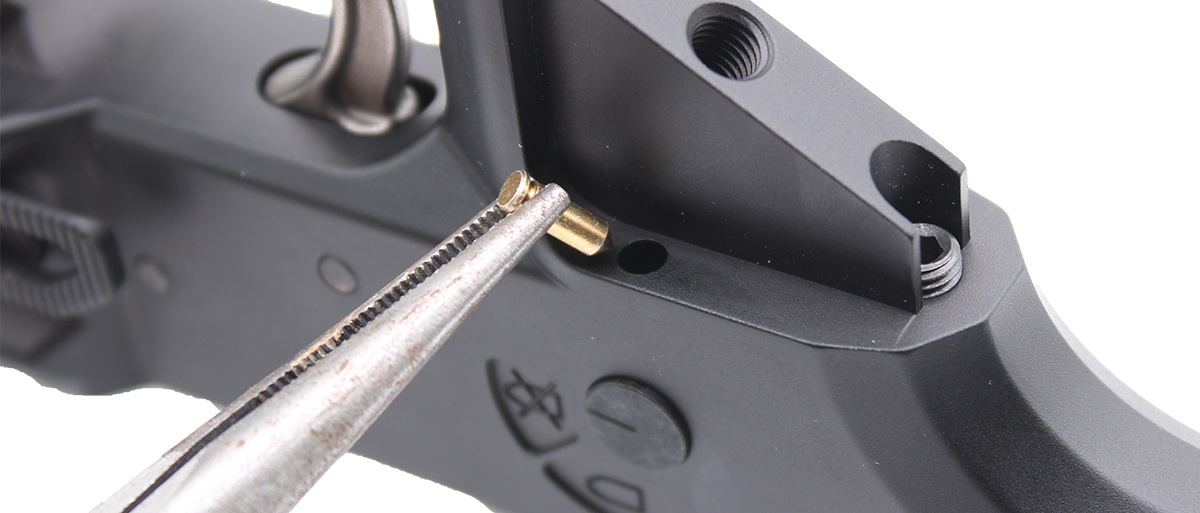
Flip the receiver over and upside down. Next to the pistol grip mount, drop the safety lever detent into the hole underneath the opposite side of the safety lever.
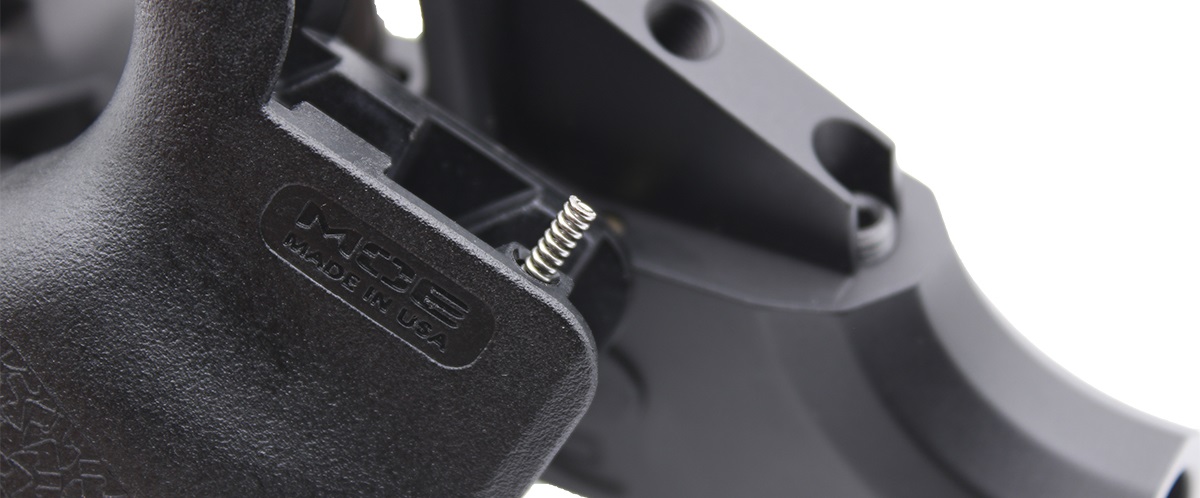
Insert the safety lever detent spring into the hole in the top of the pistol grip.
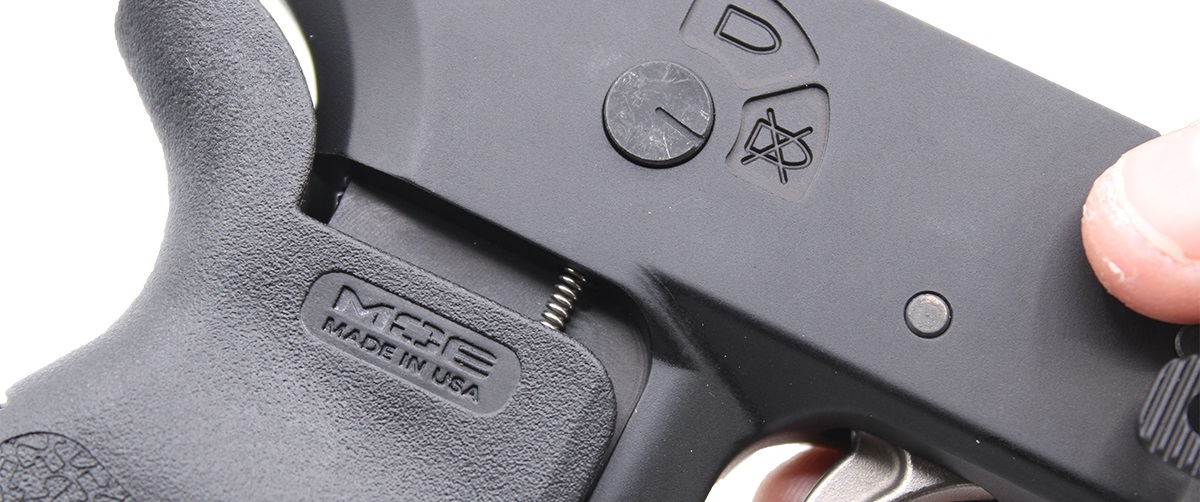
Press the grip onto the receiver, ensuring the spring captures the safety lever detent.
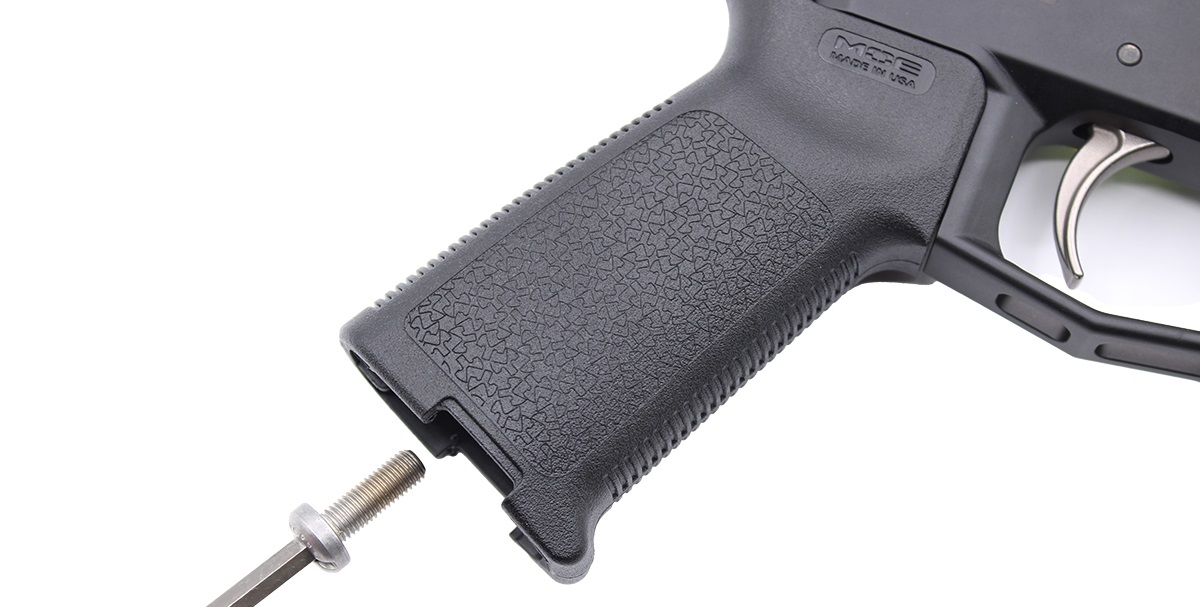
Once the grip is fully seated on the receiver, install and tighten the pistol grip screw. Your screw may or may not have come with a washer. You may need to use a hex driver or screwdriver to tighten the screw.
7. Install Buffer, Takedown Pin & Buffer Retainer
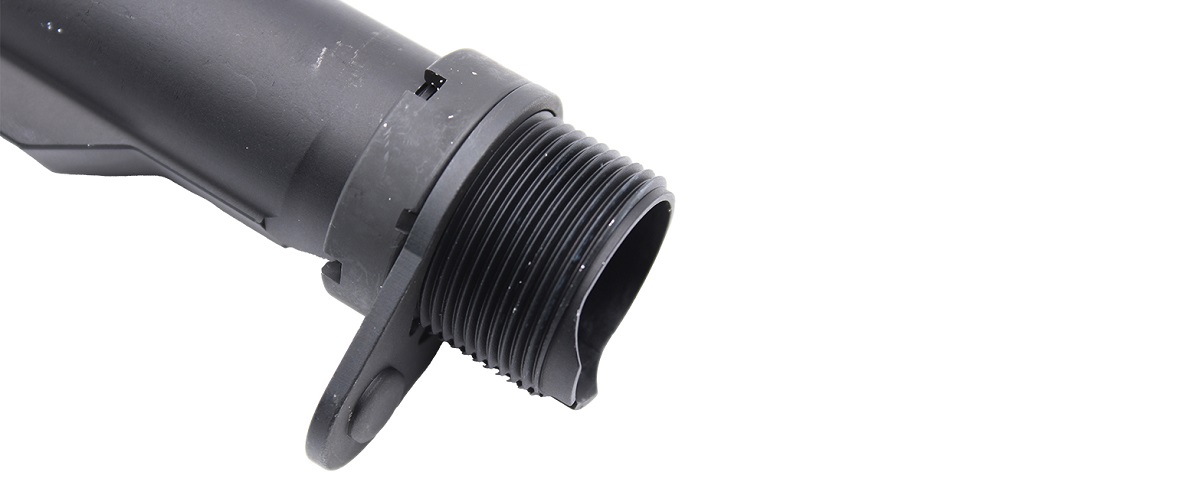
Thread the castle nut onto the buffer tube, ensuring the "crown" of the nut is facing the rear of the tube, away from the threads. Then slide the latch plate onto the tube, aligning the post on the plate with the cut-out in the threads on the bottom of the tube.

Partially thread the buffer tube into the buffer tube housing on the lower receiver.
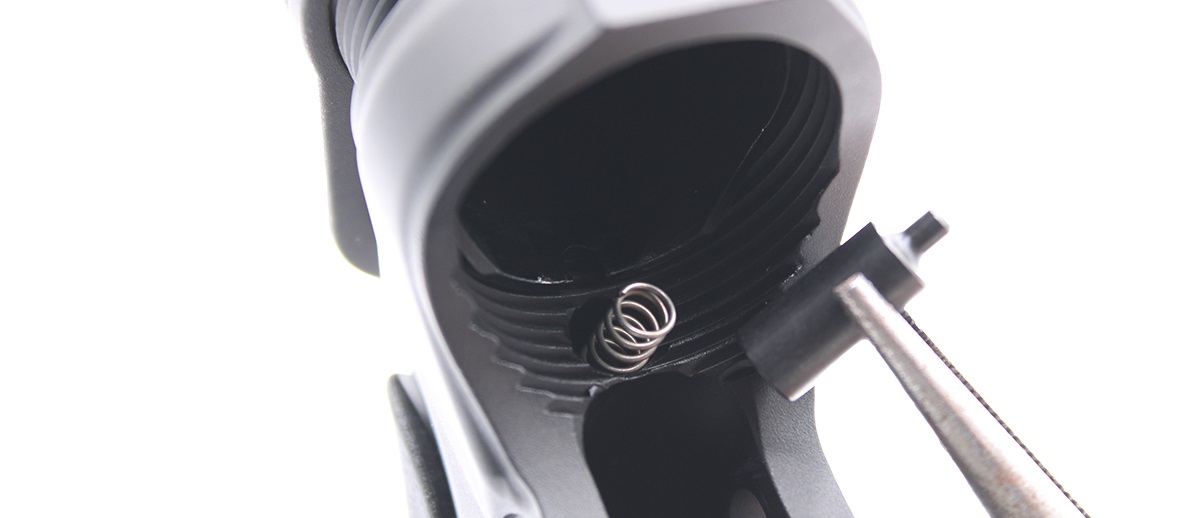
Drop the buffer retainer spring and buffer retainer into the hole machined into the threads of the buffer tube housing. Then continue threading the buffer tube into the lower receiver. Depress the buffer retainer with a punch so the tip of the retainer clears the tube.
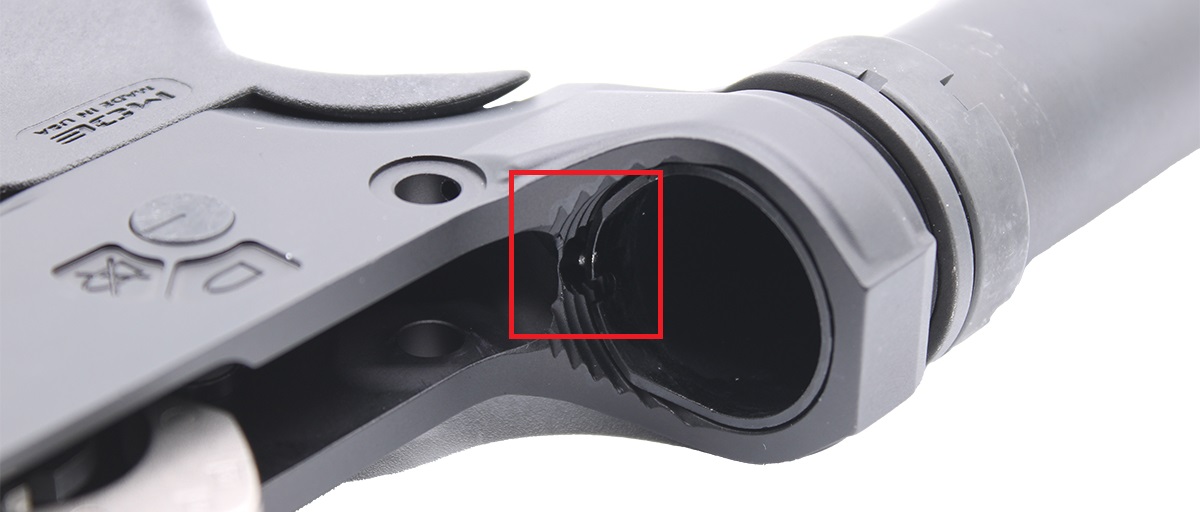
Thread the buffer tube into its housing until it fully captures the buffer retainer. Then depress the retainer once again, and partially thread the tube past the retainer. Only turn the tube enough to expose the small hole at the rear of the receiver, behind the latch plate (see below).
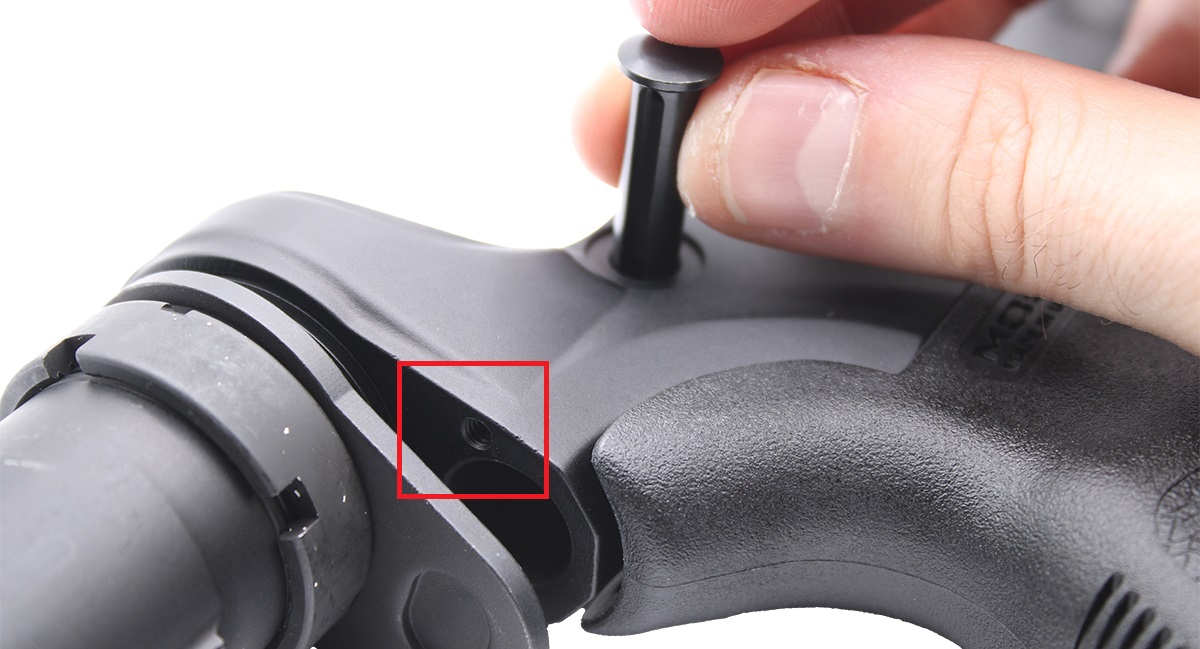
Insert the takedown pin into the receiver. The cut-out on the pin should face the rear of the receiver, aligning with the hole highlighted in red, above.
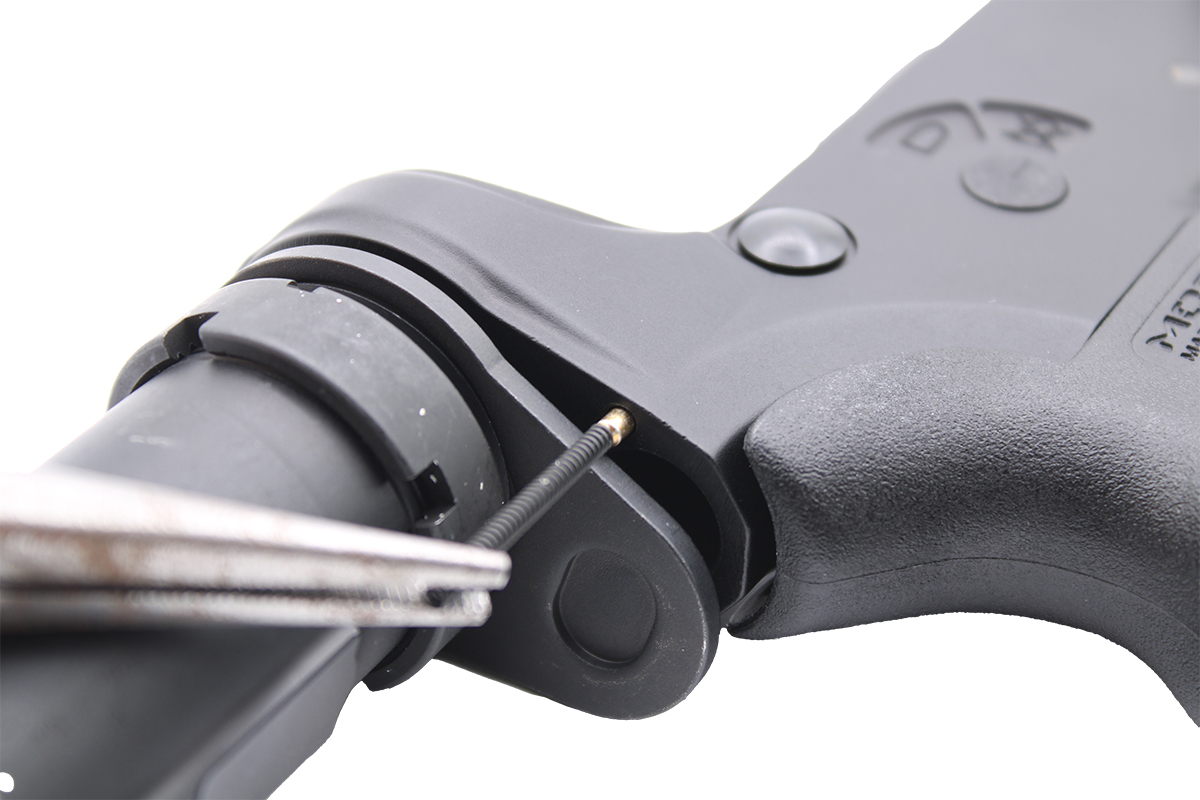
With the takedown pin fully seated, insert the takedown pin's detent and spring into the exposed hole at the rear of the receiver.
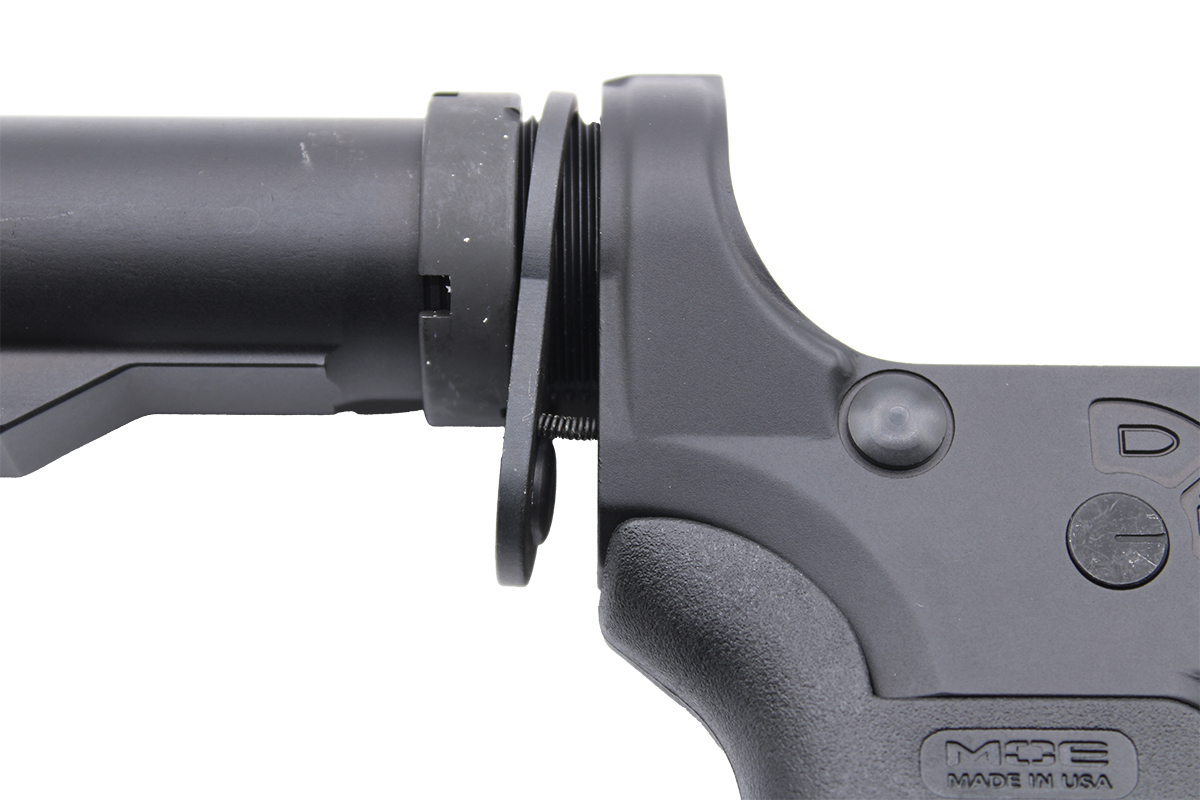
The latch plate will compress and capture the takedown pin detent and spring. Rotate the buffer tube into position, aligning the latch plate with the rear of the receiver. Ensure the buffer retainer installed earlier is still captured inside the housing.
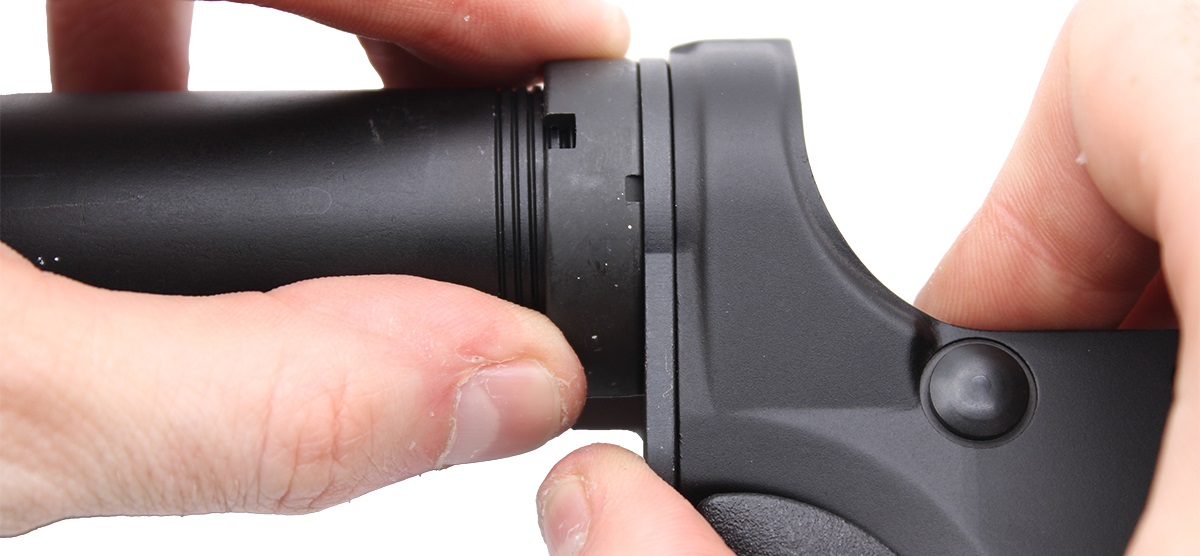
Press the latch plate down against the rear of the receiver. While holding it in place, thread the castle nut again the latch plate by hand.
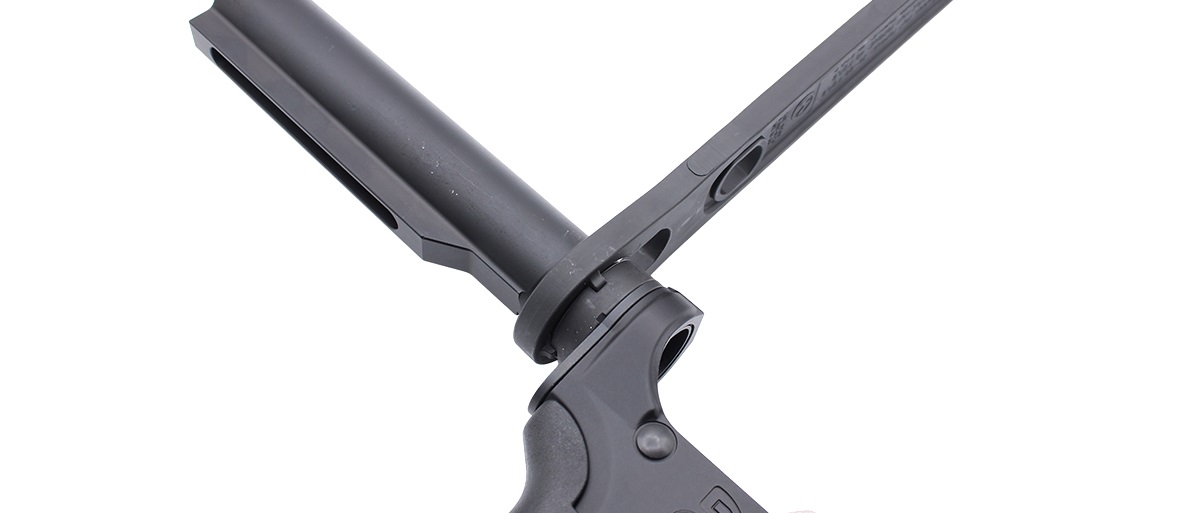
Use the armorer's wrench to finish tightening the castle nut, securing the buffer tube and latch plate.
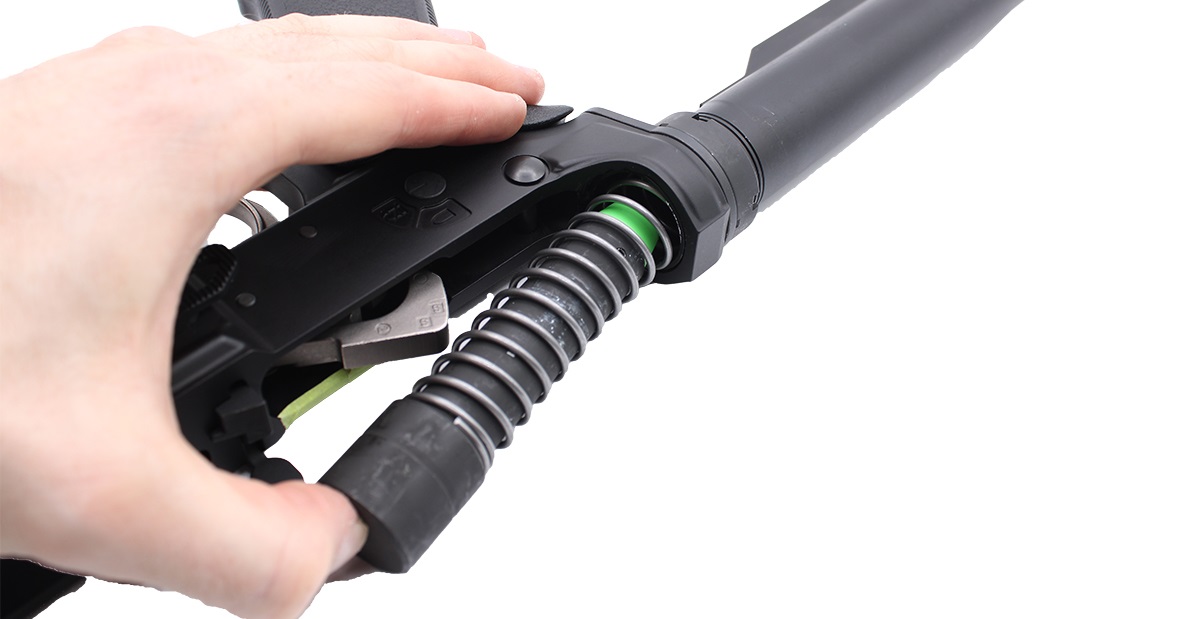
Install the recoil spring and buffer inside the buffer tube. Press the assembly into the tube until the buffer retainer captures the head of the buffer.
8. Install Front Pivot Pin
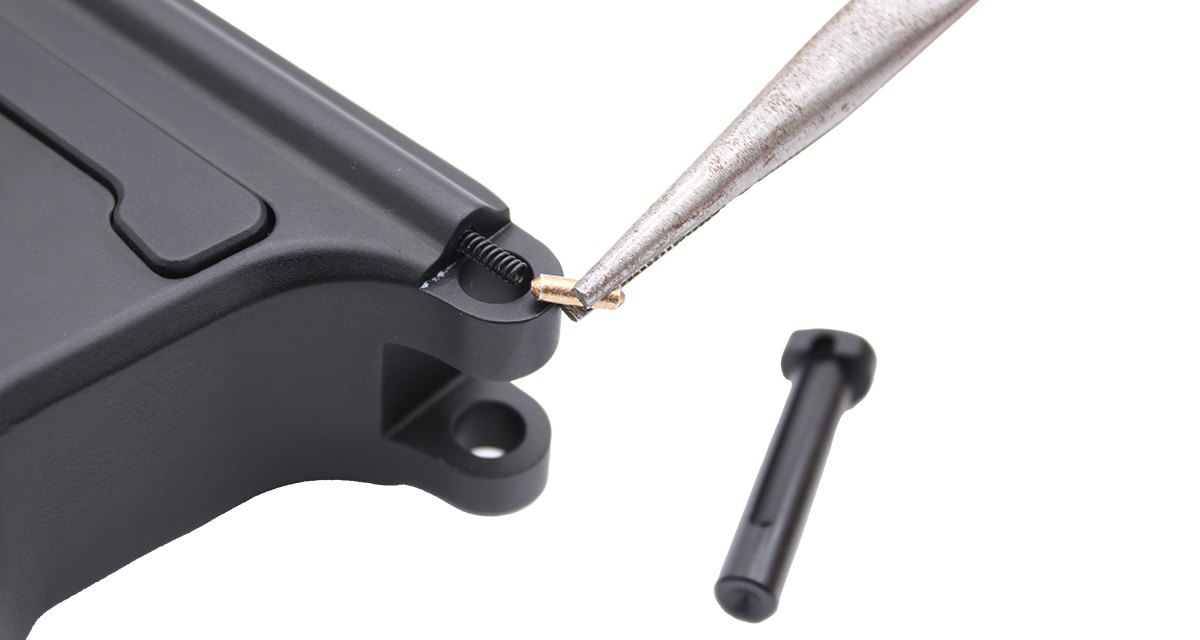
Insert the pivot pin spring into the hole machined just beside the right-side pivot pin mount. The spring must be inserted first, followed by the detent.
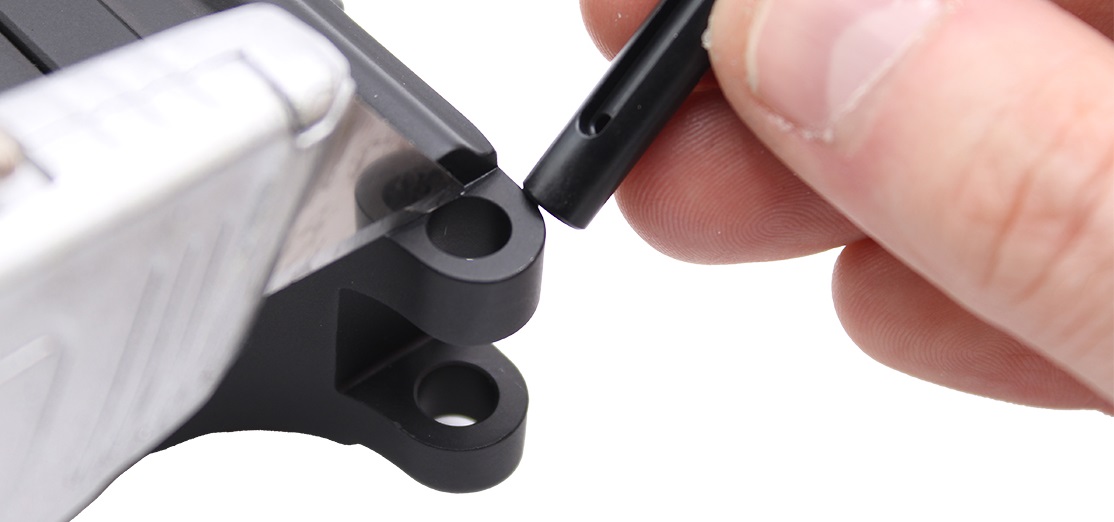
The detent must be compressed to make room for the insertion of the pivot pin.
WARNING! The detent is under high spring tension! It is likely to eject from its hole if care is not taken to keep it trapped while inserting the pivot pin.
It helps to use a thin blade to compress and secure the detent.
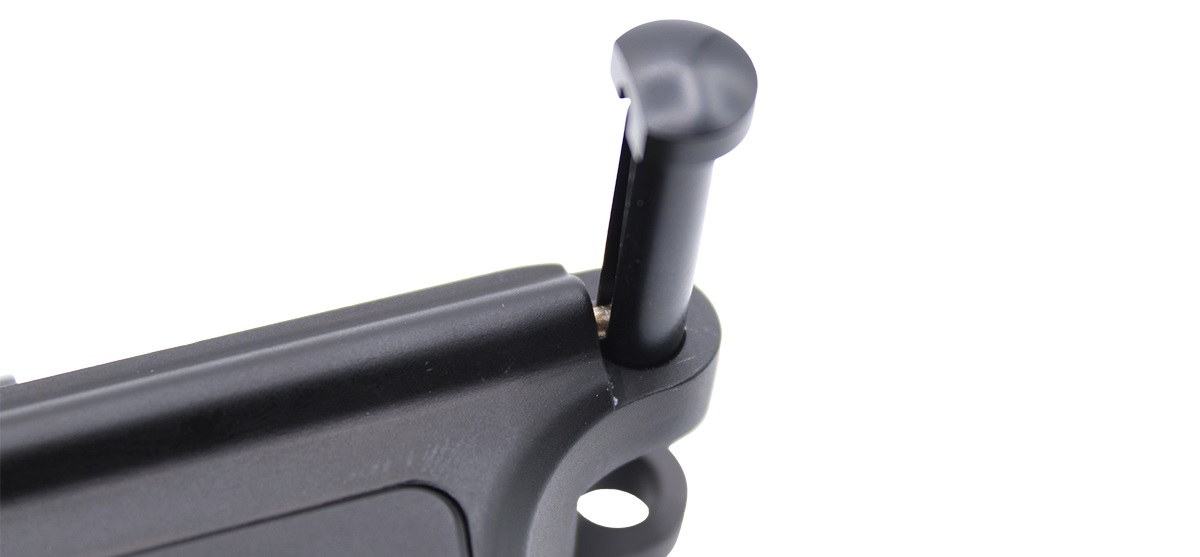
Drop the pivot into its mounting hole while ensuring the cut-out in the pin is aligned with the detent. Once inserted, the pin will capture the detent.
9. Install Upper Receiver Assembly
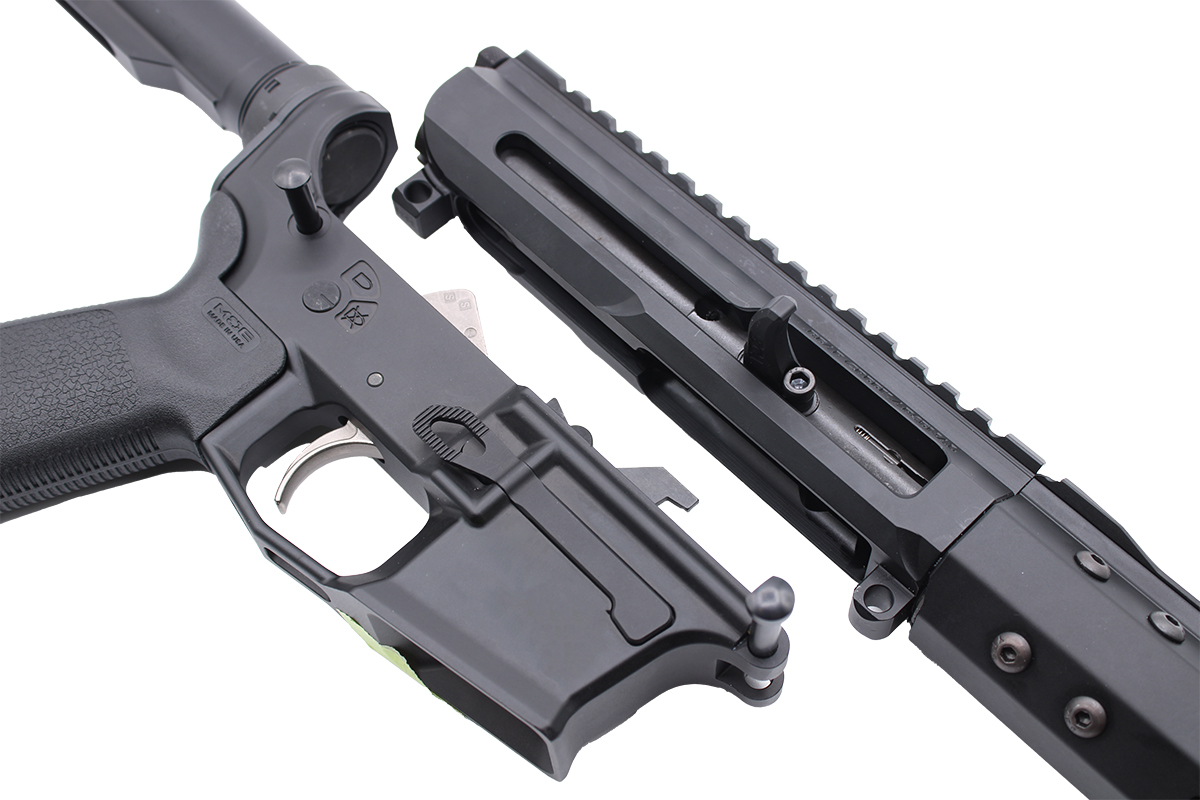
Your AR-9 lower is complete! You can now install a barreled AR-9 upper assembly.
Need Help Building The AR-9 Upper?
Read our guide, "How to Build an AR Upper: Instructions & Photos."
These instructions walk you through installing the barrel, barrel nut, handguard, and bolt. The steps for assembling the AR-9 are identical to the steps shown in this guide -- just skip the steps involving the gas block and gas tube!
DISCLAIMER: If you are new to the world of DIY gun building, you likely have a lot of questions and rightfully so. It’s an area that has a lot of questions that, without the correct answers, could have some serious implications. At 80-lower.com, we are by no means providing this content on our website to serve as legal advice or legal counsel. We encourage each and every builder to perform their own research around their respective State laws as well as educating themselves on the Federal laws. When performing your own research, please be sure that you are getting your information from a reliable source.
