
AR-15 Parts: The Builder’s Master Guide
The AR-15 is probably the most popular rifle bought and sold in America. If you’re reading this, you probably want one. There are two ways to join the owners’ club and this guide’s going to show you how to earn your membership:
- Option 1: Buy an AR-15 at a store that probably costs too much. Pay fees and taxes.
- Option 2: Build a better AR-15. Avoid branded premiums, pay less, and get the parts you want.
Still here? Then you’ve selected option 2. Smart.
This is your parts guide for building an AR-15. We’re covering all parts found on the typical AR setup. These parts are applicable regardless of caliber or configuration (rifle or pistol). We’ll cover every component you need to build an AR, and we’ll explain those parts’ purpose, including how they all work. Those parts include the:
- Barrel assembly
- Upper receiver
- Lower receiver
- Lower parts kit
- Buffer assembly
- Bolt carrier group
- Gas system
- Handguard
The AR platform comprises two separate halves that work together to create a functional rifle or pistol: The upper receiver assembly and the lower receiver assembly. Let’s cover the lower receiver first — it’s considered the firearm component of the AR platform, and acquiring one is how most builders start their custom AR project.
The Lower Receiver Assembly

The
lower receiver assembly consists of three parts that work together to store and feed ammunition, manage recoil, cycle the bolt carrier group, and operate the safety, trigger, hammer, and disconnector for semiautomatic fire.
Those three parts are the:
- Stripped lower receiver (the firearm itself)
- Lower parts kit
- Buffer tube assembly
Let’s look at these three parts in greater detail.
1. The Stripped Lower Receiver
Building an AR-15 starts with buying or building a stripped lower receiver. The stripped lower is the only component of the AR platform that is considered a firearm by law. All other parts of the AR-15, including the upper receiver, are
not considered firearms themselves. Those parts and assemblies are bought and sold like any other non-firearm part or accessory online or in a store. You have two options to pick from when it comes to getting a lower for your build:
Option 1: Stripped Lower Receiver (firearm)

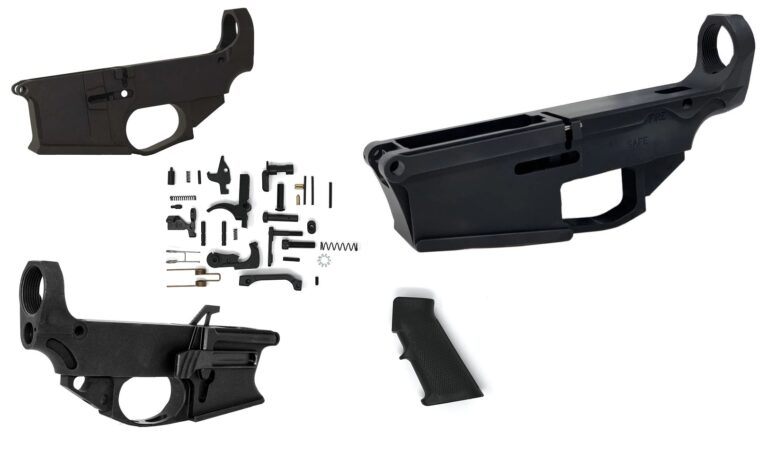
The stripped lower receiver is a serialized, ready-to-assemble firearm in the eyes of the law. It is not functional as a firearm by itself. It doesn’t have a barrel, stock, grip, trigger, or upper receiver, and no other internal parts.
Even still, you must go through the same legal paperwork and process to purchase a stripped lower receiver as you would if you were buying a complete firearm: You must fill out and pass a background check (Form 4473), pay some fees to the FFL (Federal Firearm Licensee) you’re purchasing the unit from, and pay certain fees and taxes.
Option 2: 80% Lower Receiver (receiver blank)

Option 2 is why 80-Lower.com exists: Under federal law, you may instead create a stripped receiver at home to start your build by picking up and fabricating an 80% lower. Under federal law, an 80% lower that can’t readily be completed or converted into a working receiver isn’t a firearm. ATF’s 2022 frame and receiver rule, which the Supreme Court upheld in Bondi v. VanDerStok (2025), made clear that some partially complete receivers and kits do count as firearms, and many states restrict 80% lowers outright.
Look closely and you’ll see the internal cavity for the trigger and parts kit is not machined. These units are also missing the holes for the hammer, trigger, and safety lever pins. You must drill these holes and cut the internal cavity yourself, creating a stripped lower receiver. Federal law allows you to make a firearm for your own use, but state and local laws vary, so check yours before you buy or build. This guide is general information, not legal advice.
Build it: Buy an 80% lower here.
Mini-guide: Common AR-type 80% lowers compared.
2. Lower Parts Kit

The lower parts kit (LPK) performs the most important functions of the AR-15. It controls the function of the hammer via the trigger’s sear and disconnector, allowing for semiautomatic fire. It also allows the shooter to select “SAFE” or “FIRE” via the safety lever. Lastly, it’s responsible for holding and releasing the magazine in the lower receiver, and it includes a catch-and-release mechanism for the bolt, located in the upper receiver.
Build it: Buy a lower parts kit here.
Mini-guide: How to install the AR-15 lower parts kit.
Let’s take a closer look at the lower parts kit’s components.
Fire Control Group Components

The fire control group contains the most important pieces of the LPK: The hammer, hammer hook and hammer spring, trigger and trigger spring, disconnector and disconnector spring, and the trigger and hammer pins for installing those parts in the stripped lower. All these parts sit inside the main cavity of the lower receiver.
Hammer & Hammer Spring

The hammer strikes the firing pin inside the bolt carrier group, causing the chambered cartridge to ignite, sending a round through the barrel. The hammer spring provides tension on the hammer when it is cocked. When the hammer is released, that spring tension provides the force that is necessary to strike the firing pin hard enough to ignite the round’s primer.
Trigger & Trigger Spring

The trigger releases the hammer when it is cocked. The trigger assembly includes the trigger spring (pictured above, wrapped around the trigger itself), the disconnector spring, and the sear. The sear is the small bar above and in front of the trigger bow. It is responsible for holding the hammer in the cocked position.
Once a round is ignited, its expelled gasses force the bolt carrier group to drive rearward. This action forces the hammer back down into the cocked position. Since the trigger is still depressed by the shooter’s finger when this action occurs, the disconnector must temporarily hold the hammer in the cocked position until the trigger is released.
Disconnector & Disconnector Spring

The disconnector sits atop the trigger and attaches to the trigger via the trigger pin. As described above, the disconnector catches the hammer after the bolt rides backwards, holding the hammer down until the sear on the trigger engages the hook on the hammer. The disconnector spring provides the necessary tension for the disconnector to latch onto the hammer via the hammer hook.
Hammer Hook

The hook is located on the back of the hammer. The hammer hook interlocks with the raised, hooked portion of the disconnector. It is this temporary connection between the hook and disconnector that keeps the hammer held in the cocked position until the trigger is reset.
Hammer & Trigger Pins

The hammer and trigger pins are responsible for keeping the entire fire control group secured inside the lower receiver. To ensure the hammer and trigger springs remain seated (and to help prevent the pins from sliding out of their holes in the receiver), each pin has small notches for the legs of the hammer and trigger springs to be seated upon.
How the fire control group functions
To summarize all the actions above:
1. The trigger is pulled, releasing the hammer from the sear.
2. The hammer strikes the firing pin inside the bolt carrier group (BCG).
3. The chambered round ignites, and spent gas forces the BCG rearward.
4. The BCG’s rearward travel pushes the hammer back down.
5. The trigger isn’t reset yet, so the disconnector catches the hook on the hammer.
6. The shooter releases the trigger, resetting it.
7. The disconnector releases the hammer, and the trigger’s sear catches the hammer to keep it cocked.
8. The bolt drives forward, a new round is chambered, and the AR is ready to fire again.
Remaining LPK Components
The remaining parts of the LPK include all the other pieces you’ll need to turn your stripped lower receiver into a complete, ready-to-fire assembly:
Selector Lever (“Safety”)

The selector lever, commonly called the “safety”, sits flush against the left side of the lower receiver. When engaged, or “SAFE”, the rounded portion of the lever inside the receiver prevents the trigger from being pulled. When disengaged, or set to “FIRE”, the lever rotates to expose a flattened portion that allows clearance for the trigger to be pulled. A small detent and spring capture the lever, preventing it from falling out of the receiver.
Magazine Catch & Button

The magazine catch and button work together, allowing you to insert and remove magazines. The notched portion of the catch engages with the magazine inside the lower’s magazine well. When the button is depressed from the right side of the receiver, the catch is released and the magazine falls. The pictured spring keeps tension against the catch, preventing the magazine from releasing until the mag button is depressed.
Takedown & Pivot Pins

The pivot and takedown pins keep the AR’s upper and lower receiver assemblies secured to each other. The pins are permanently installed inside holes located at the front and rear of the lower receiver. These pins are held in place by springs and detents. Pulling on the rear takedown pin allows access inside the upper and lower receivers to clean both assemblies and to remove the bolt. Pulling both pins allows for complete separation of the upper and lower receivers.
Bolt Catch Assembly

The bolt catch grabs the bolt carrier group when the last round in a magazine is fired, preventing it from driving forward into an empty chamber. The shooter can also manually engage the bolt catch by depressing the catch while pulling on the charging handle. The button on the catch releases the bolt, driving it forward and chambering a round once a fresh magazine is loaded. A roll pin secures the catch to the lower receiver. A spring and buffer provide tension for the catch to properly actuate.
Buffer Retainer

The buffer retainer rests inside the lower receiver, inside the buffer tube housing’s threads. Its job is to prevent the recoil spring and buffer from decompressing and flying out of the tube when the receivers are separated. The small nib atop the retainer rests against the face of the buffer. To remove the buffer, one can depress the retainer and its spring.
Detents and Springs

A series of detents and springs are used to secure some of the moving parts to the receiver, like the pivot and takedown pins, and the safety selector lever. These spring-loaded detents act like little “stops”, preventing those parts from falling out when pulled or rotated.
3. Buffer Assembly

The buffer assembly consists of the recoil spring, weighted buffer, receiver extension (buffer tube), buttstock or pistol brace, latch plate, and the castle nut for tightening the tube to the lower receiver.
Build it: Buy a buffer assembly here.
Receiver Extension (Buffer Tube)

The receiver extension (called a buffer tube) is responsible for housing the recoil spring and buffer. When the AR-15 is fired and the bolt carrier group is forced backward, it rides into the buffer tube and compresses the recoil spring via the buffer. Once compressed, the spring and buffer forces the bolt to drive forward, chambering another round.
Mini-guide: Commercial vs. mil-spec buffer tubes explained.
Recoil Spring

There are two types of recoil springs made for the AR platform. The less common spring is designed for the fixed A2-type stock with a hidden buffer tube, seen on old M16s and modern semiautomatic replicas. This longer spring measures 12″. The common carbine spring, found in virtually all AR-15s today, measures 10″ and is designed for the adjustable buttstock and exposed buffer tube.
Buffer

The buffer is responsible for handling the recoil and blunt force created by the rearward movement of the BCG. The flat face of the buffer rests against the backside of the BCG, while the pointed end with the rubber cap rests inside the recoil spring. The rubber end is designed to eliminate damage to the buffer tube if it bottoms out under excessive recoil.
Mini-guide: The guide to AR-15 buffers and weights.
Castle Nut & Latch Plate

The castle nut tightens the receiver extension to the back of the lower receiver, while the latch plate prevents the extension/tube from rotating in the threads. The small “nib” on the inside ring of the latch plate locks into the channel cut underneath the buffer tube. The round protrusion on the bottom of the plate rests inside an indentation at the back of the receiver, trapping the plate in place.
Buttstock

The buttstock provides comfort and recoil control for AR-type rifles. It allows you to obtain a good sight picture and enjoy stability with your rifle while you send rounds downrange. The AR-15 generally uses two configurations (fixed or adjustable stocks) with the latter being the most common by a wide margin. Shown above is how the castle nut and latch plate are installed on the buffer tube to secure the tube and stock to the lower receiver.
Pistol Brace

Build it: Buy a stock or brace here.
Some builders prefer shooting a compact, pistol-type AR with a barrel shorter than 16″. Under normal circumstances, any firearm equipped with a buttstock must have a barrel measuring 16″ or longer. Building any rifle with a barrel measuring less than 16″ means you’re constructing a short-barreled rifle (SBR), which is an NFA firearm.
Owning an NFA firearm requires ATF approval and registration after a background check. The tax for SBRs dropped from $200 to $0 on January 1, 2026, but the approval process still applies. If you choose to build an AR pistol, you can only use a pistol brace or you must keep your buffer tube exposed with no brace and no stock installed.
The Upper Receiver Assembly
 Take a break and grab a coffee (or beer, it’s 5 o’ clock somewhere), because we’re half-way through our list of AR-15 parts. The rifle’s upper receiver assembly is the “business end” of things: It’s where the bolt chambers a round and the firing pin meets the primer, causing live rounds to exit the barrel. Like the lower receiver, the upper consists of systems of various parts that work together. These parts include the:
- Gas system
- Stripped upper receiver
- Bolt carrier group
- Charging handle
- Handguard
- Barrel
Build it: Buy a pre-built upper receiver assembly here.
Want to build your upper? Links to individual parts are below.
Let’s break each set of parts down and explain how they work.
1. The Gas System
The AR-15’s gas system is a direct-impingement system: Gas expelled by an ignited cartridge travels down the barrel, behind the projectile. Some of this gas is diverted back into the upper receiver via the gas block and gas tube. This diverted gas is forced into the bolt carrier group, driving it rearward into the buffer tube.
Gas Block

The gas block is fitted directly to the barrel. A small hole drilled in the barrel, called a gas port, allows gas to travel through the block into the tube. Most gas ports have a diameter of 0.063″ to 0.089″. Gas blocks are commonly found in two configurations, shown above: The classic “A2-style”, which combines a front sight post and gas block into one unit (pictured left), and the modern, lightweight low-profile block, pictured right.
Gas Tube

The tube directs gas from the block to another port in the front of the upper receiver. The receiver’s gas port is located directly above the barrel nut. Part of the tube enters the port and interfaces with the gas key atop the bolt carrier group (shown below). The length of the gas tube is dictated by selecting one of four available gas systems:
- Pistol (6.75″ tube)
- Carbine (9.75″ tube)
- Mid-length (11.75″ tube)
- Rifle (15.25″ tube)
Build it: Buy a gas block and tube here.
Bolt Carrier Group Gas Key

Although it’s a component of the bolt carrier group, the gas key is part of the gas system, too. The key is hollow, allowing gas from the gas tube to be directed into the body of the BCG. This expansion of gas forces the carrier backwards into the buffer tube. This cycles the weapon by ejecting and chambering another round, and resetting the trigger, hammer, and disconnector.
Mini-guide: The Guide to AR gas systems.
2. The Upper Receiver

The stripped upper receiver is responsible for securing the barrel and barrel extension (firing chamber) so live rounds can be fed and ignited. It contains the bolt carrier group and charging handle, positioning the bolt so the hammer can release and strike the firing pin when the trigger is pulled.
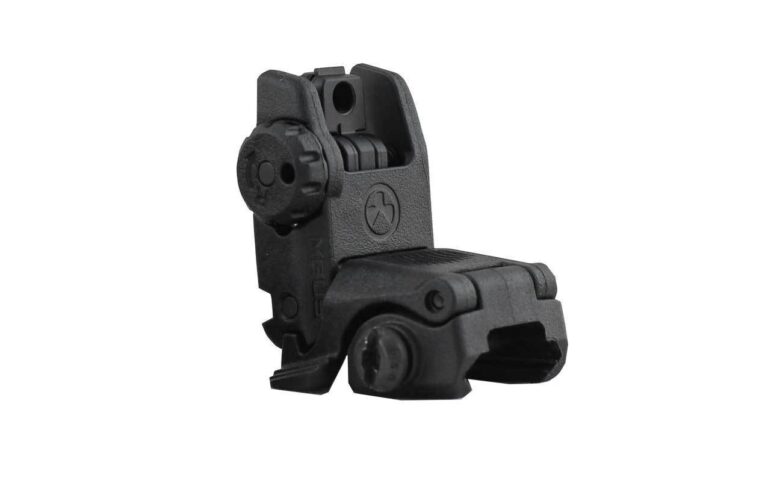
The stripped upper is mechanically simple. It incorporates a dust cover and, often, a forward assist. Both features are optional and aren’t required for the AR to function. The Picatinny rail atop the receiver is the most common method for installing rear iron sights and an optic.
Build it: Buy a stripped upper receiver here.
Build it: Buy rear iron sights or an optic here.
Build it: Buy a charging handle here.
Mini-guide: How to assemble the AR-15 barrel & upper receiver.
3. The Bolt Carrier Group

The bolt carrier group (BCG) rests inside the stripped upper receiver. The BCG is responsible for igniting live rounds with the firing pin and hammer. The BCG is one of the most important parts of the AR-15.
Build it: Buy a bolt carrier group here.
Mini-guide: The guide to the AR-15 bolt carrier group.
4. The Handguard

The AR-15’s handguard serves two purposes: Protect the gas block and tube from damage, and protect your hand from the heat generated by the barrel when firing. Handguards are configured as two-piece units, like the “old-school” plastic M4-type guard shown left, and one-piece handguards milled from aluminum, shown right.
Unless you’re interested in building a clone or replica of an older M16 or M4, you’ll probably want to invest in a one-piece handguard. They’re lighter, they incorporate modern accessory attachment systems like M-LOK, KeyMod, and Picatinny rails, and they “float” over the barrel. That means they do not secure to the barrel via the gas block, which helps to improve accuracy.
Build it: Buy a handguard w/ install hardware here.
Mini-guide: M-LOK and KeyMod handguards compared.
5. The Barrel

The barrel is responsible for sending rounds downrange. The barrel exampled above is typical for any AR-15 chambered in 5.56 NATO or .223 Remington: It measures 16″ in length, it’s made from 4150 Chromoly Vanadium steel, and it features a 1:7 twist rate. It’s drilled for a carbine-length gas port and it’s coated with a Melonite finish.
Build it: Buy a barrel here.
If all these specifications sound confusing, don’t worry. Let’s break each of them down.
AR-15 Barrel Specifications
Length.
Length dictates how much barrel you’re working with. The longer the barrel, the higher the velocity your rounds will achieve, which translates into better accuracy and range. Most AR-15 barrels chambered in 5.56 or .223 measure 16″, simply because anything longer provides little extra benefit.
Twist rate.
Twist rate measures how often the rifling inside the barrel makes one full rotation, measured in inches. A 1:7 twist rate completes one full rotation every seven inches. For a 1:8 twist rate, it would rotate once every eight inches, and so on. Heavier cartridges need faster twist rates. Most 5.56/.223 rifles use a 1:7 or 1:8 twist, as do most AR-15s chambered in 300 Blackout. ARs chambered in .308 Win and 9mm work best with a 1:10 twist rate.
Barrel contour.
Contour describes the exterior shape of the barrel. The barrel shown above is forged in the common “M4” or “Government” profile. This profile is thin behind the gas port, but gets wider toward the receiver and muzzle. Custom barrels might have fluting or dimpling to reduce weight. Others barrels may sport a single, large diameter from end to end. These are usually called “bull” barrels or “heavy” barrels and they’re designed to improve stiffness and accuracy while also handling high heat from rapid fire.
Gas block diameter.
Each barrel will have the gas block diameter described among its specifications. Most 5.56/.223 rifles are forged with a 0.750″ gas block diameter.
Gas system length.
Like we covered earlier, the barrel’s gas system will be described as pistol-, carbine-, mid-, or rifle-length. Pistol and carbine gas systems are most common for 5.56/.223 and .300 BLK builds, while 9mm ARs use no gas system. Most .308 ARs work best with a mid- or rifle-length system.
Feed ramps.
The feed ramps are located inside the barrel extension, and they’re responsible for guiding rounds from the magazine into the chamber. High-end barrels use “M4” feed ramps, which are mil-spec ramps considered to be the most reliable for 5.56 NATO, 300 BLK, and .223 Remington.
Interior barrel lining.
Barrels can be lined with chrome or QPQ nitride, which greatly enhances rifling lifespan and the barrel’s ability to withstand heat from rapid fire. Stainless barrels are not lined with any treatment or coating. Today, most AR-15 barrels are treated with nitride (also called Melonite). This treatment provides similar wear resistance as chrome lining, but it tends to provide better accuracy.
Exterior coating.
Non-stainless barrels are coated on the exterior to protect against rust and corrosion. The most common exterior coating is Nitride/Melonite, or phosphate, also called Parkerizing.
Helpful Guides & Other AR Builds
Already have a warm n’ fuzzy about the typical AR platform? This guide focused on the parts required to build a traditional, mil-spec AR-15 chambered in 5.56 NATO (or .223 Remington). Here are some helpful guides for completing your 80% lower, rifle, or pistol, as well as guides for other types of builds: